Quick Start#
What’s included in the box?#
When you purchase a brand new BeagleV-Fire, In the box you’ll get:
Quick-start card
Todo
add image & information about box content.
Tip
For board files, 3D model, and more, you can checkout BeagleV-Fire repository on OpenBeagle.
Unboxing#
Tethering to PC#
To connect BeagleV-Fire board to PC via USB Type C receptacle you need a USB type C cable. Connection guide for the same is shown below:
Tip
To get a USB type C cable you can checkout links below:
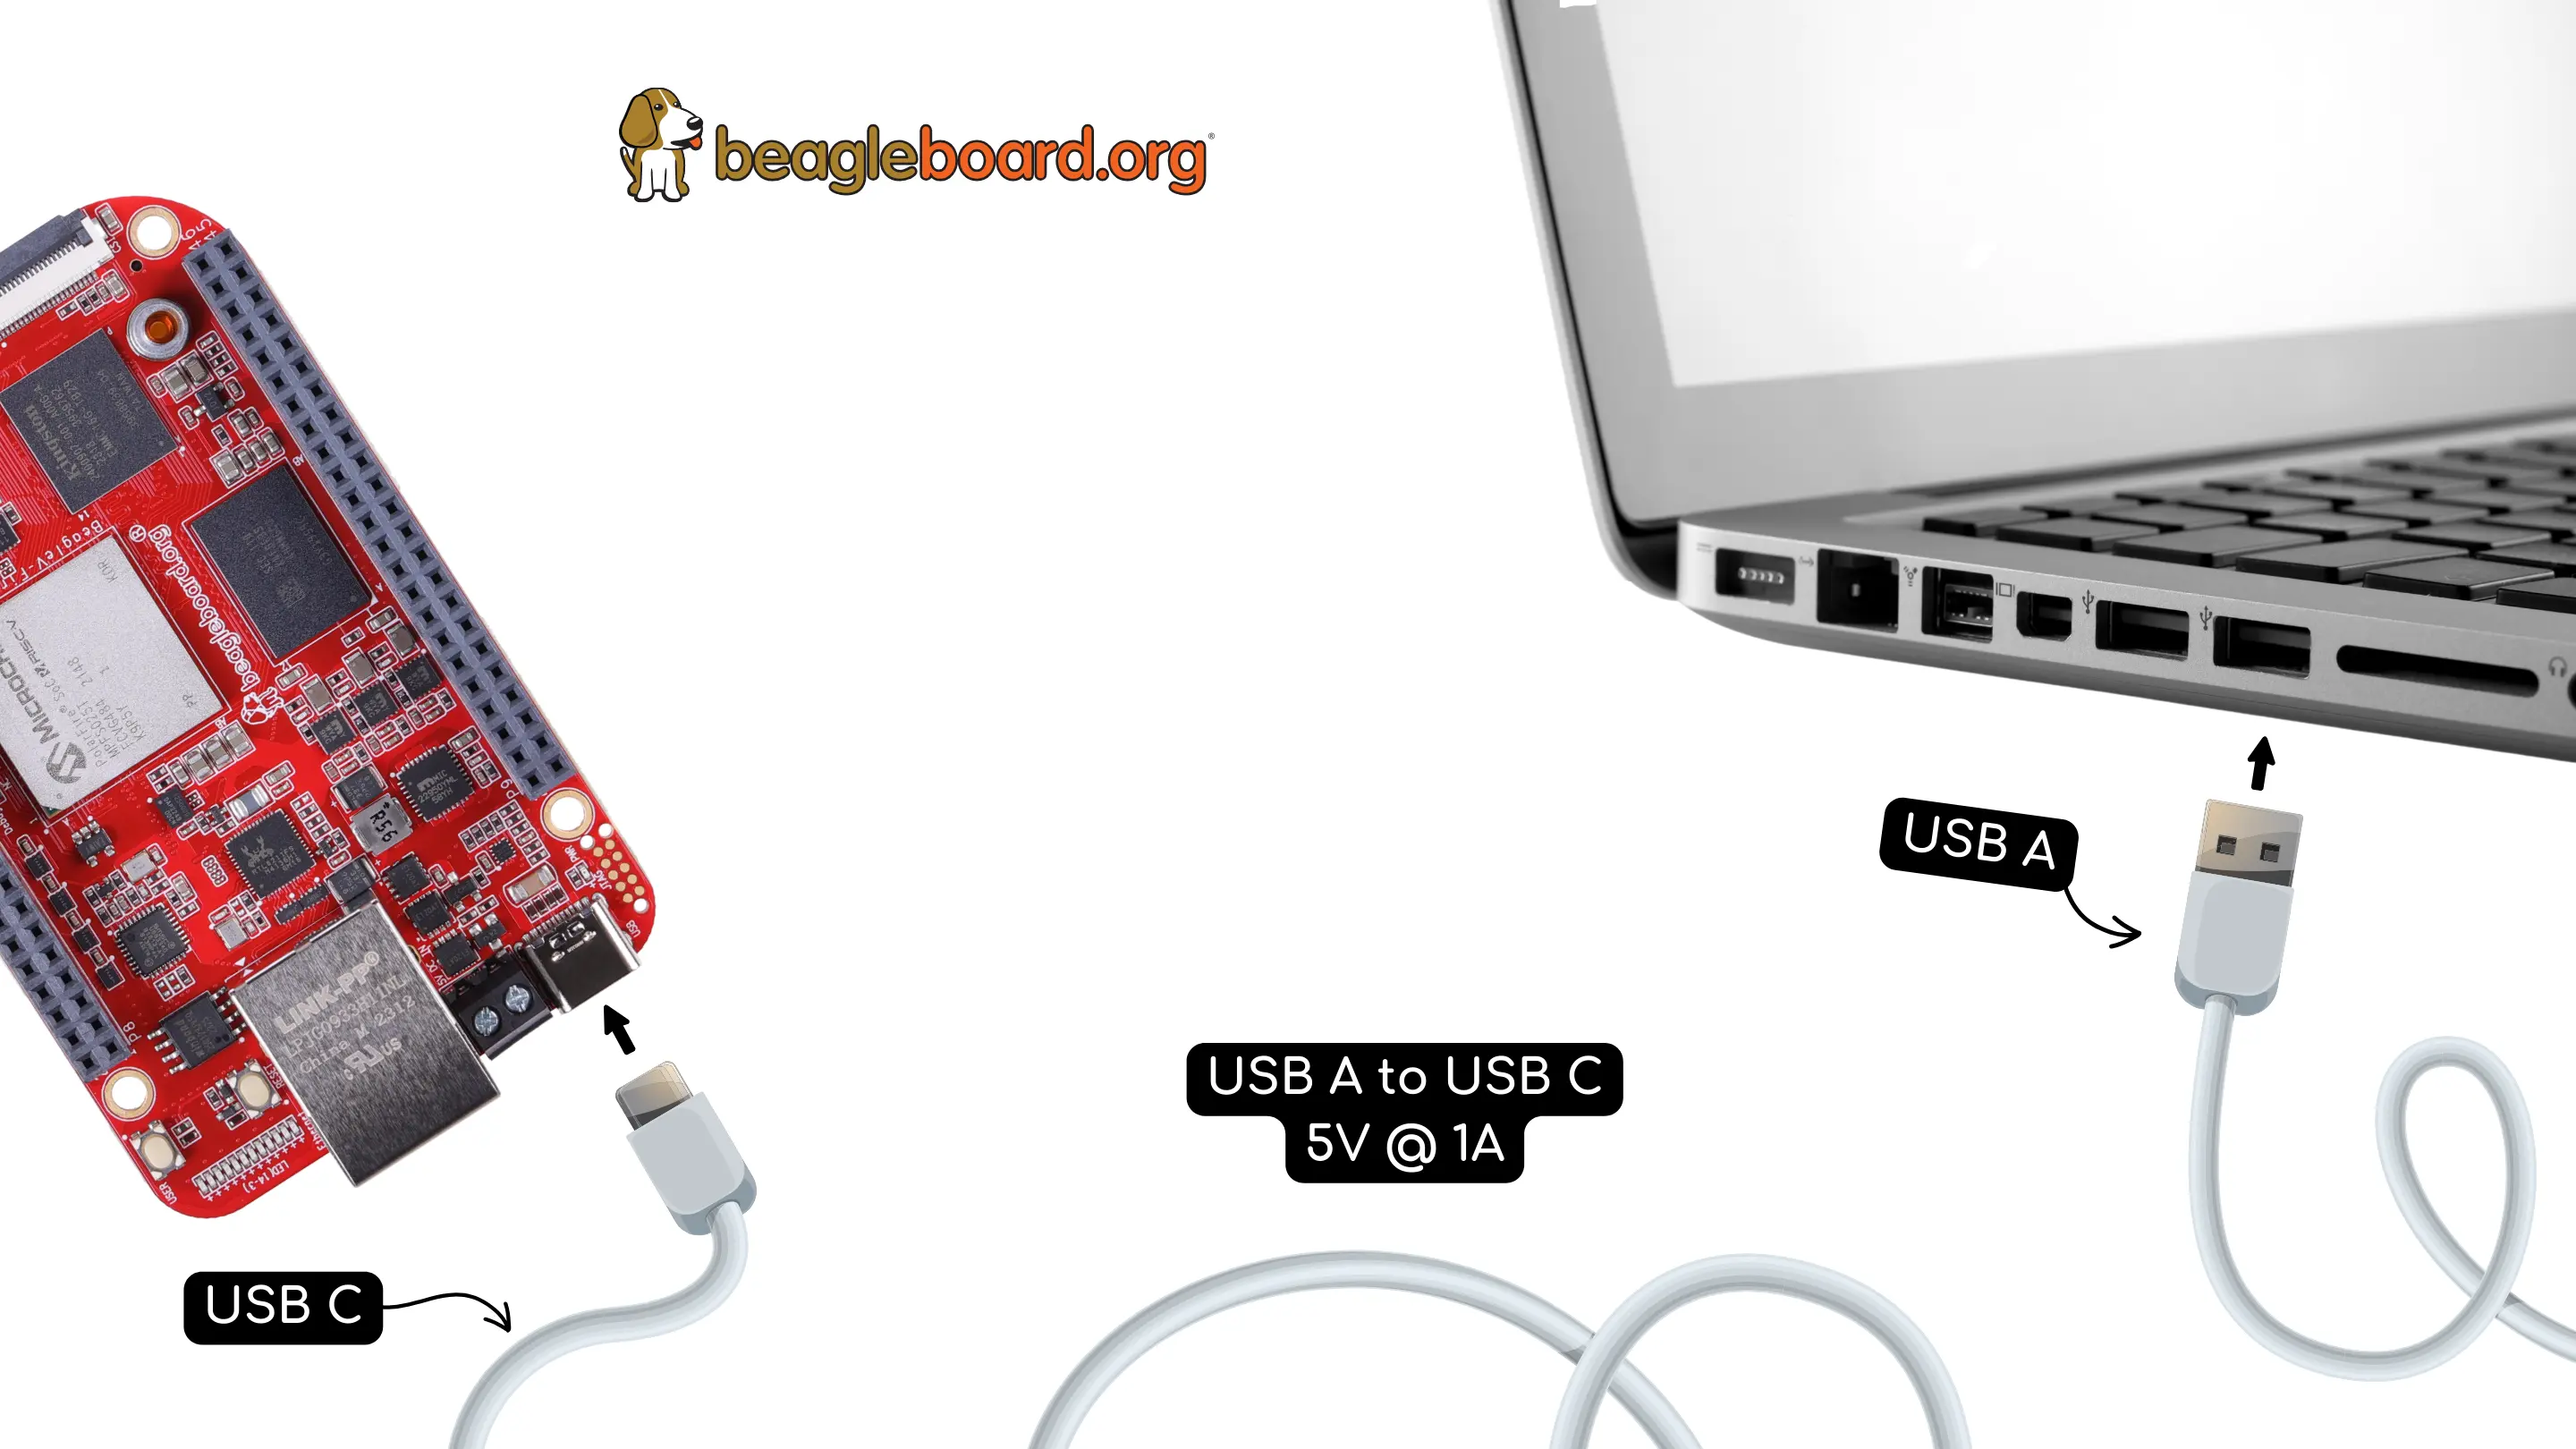
Fig. 548 BeagleV-Fire tethered connection#
Flashing eMMC#
First we need to go get Beagleboard Imager.
Grab the version suitable for your operating system.
Device Firmware Update (DFU)#
Next we need your Beagle to be ready to receive an updated image:
To enter “DFU” mode, you press and hold the USER button while connecting your Fire to the USB port on your machine.
You should let the button go once the first LED comes on.
Once you have two solid lit LEDs and an extra USB drive, we’re all set to continue.
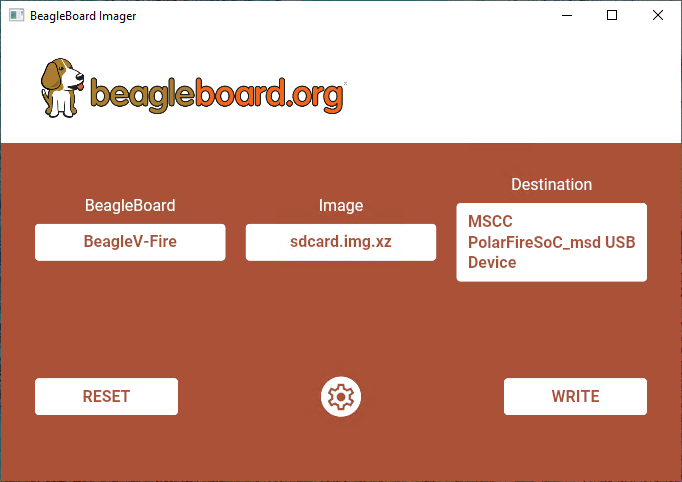
BeagleBoard Imager#
With BeagleBoard Imager running, work your way from left to right, like so:
Select board. This one’s obvious.
Select your image variant.
Select your drive. This one is critical to get right; see below.
Click
WRITEand watch it go!
With a little luck, all goes well and BeagleBoard Imager reports no errors.
In that case, you can close out BeagleBoard Imager and disconnect the USB cable.
On the next power-up, your Beagle will boot up the new image and you’re ready to rock!
Access UART debug console#
Note
Some tested devices that are known to be working well include:
To access a BeagleV-Fire serial debug console you can connect a USB to UART to your board as shown below:
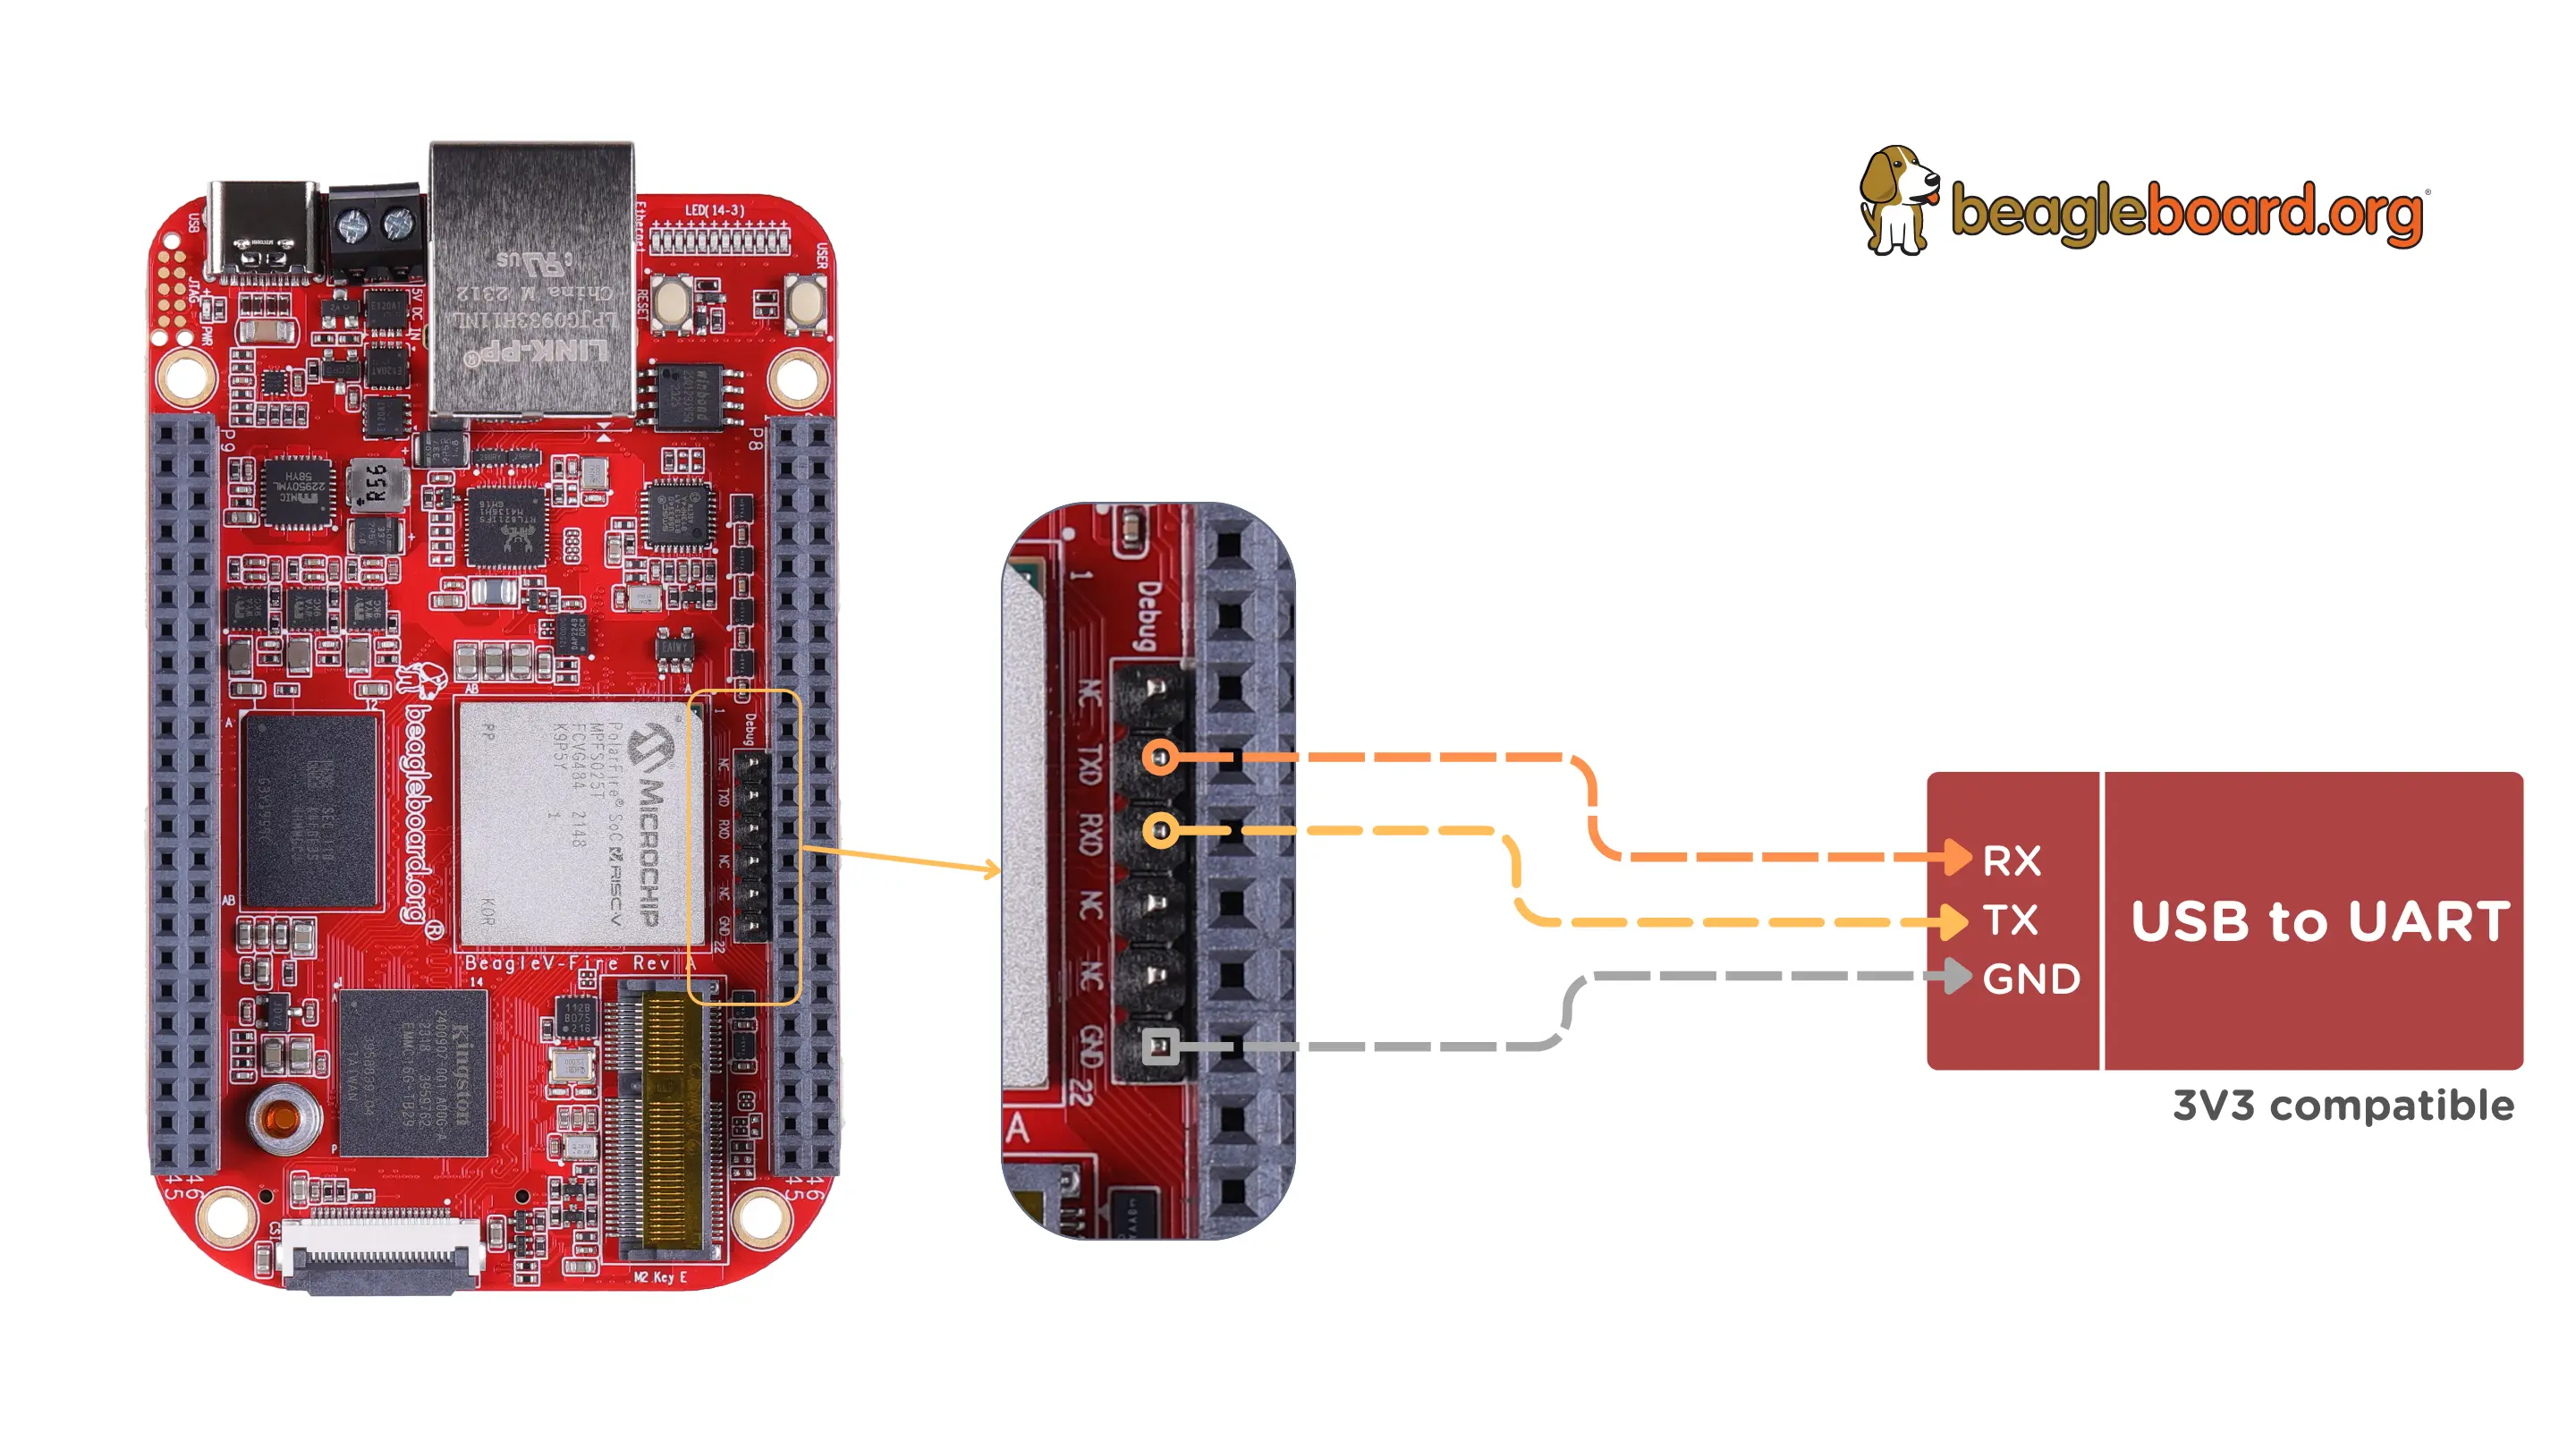
Fig. 549 BeagleV-Fire UART debug port connection#
To see the board boot log and access your BeagleV-Fire’s console you can use application like tio
to access the console. If you are using Linux your USB to UART converter may appear as /dev/ttyUSB.
It will be different for Mac and Windows operatig systems. To find serial port for your system you can checkout
this guide.
[lorforlinux@fedora ~] $ tio /dev/ttyUSB0
tio v2.5
Press ctrl-t q to quit
Connected
